 Free design service & support
 LOGIN
LOGIN
Design Tool Basics: Using Top Toolbar

The beauty of online closet design is that you can personalize your solution to fit your organization needs and personal style. Let’s lay the groundwork so you can understand the customizable options available to you in our design tool. First up? The toolbar located directly above your design.
In the top menu, you can find a variety of ways to make your closet your own:

Update Front Styles and Colors
If you select the top menu tab labeled “Front Styles,” you will find the following design options:
- Front Color: Customize the look and feel of the cabinet door and drawer fronts in your design. You can either select a finish that matches the rest of your design, or you can add interest to your solution by selecting a different color than that of the rest of your design. Tip: Choose the color of your entire closet solution in the control panel on the left side of your screen first, then choose a front color.
- Front Style: Select a profile that complements your personal style. The drawer and door style you select will be applied to all the available fronts in your design.
- Drawer Slides: All solutions that include drawers will be outfitted with standard full extension slides. However, under the “Drawer Slides” tab, you can upgrade to a Soft Close option.
- Door Hinges: Similar to a Soft Close drawer slide, you can opt for a Soft Close cabinet door hinge. Soft Close hinges reduce noise when closing doors and are a great upgrade to any solution.

Update Hardware Styles
From the wardrobe rods holding your hanging items, to the handles and accessories that make your closet function like a dream, the hardware in your design can be personalized. Check out the options available within the “Hardware Styles” tab below:
- Hardware Finish: Update the look of the hardware included in your closet design. The finish you select will be applied to the wardrobe rods, drawer handles and knobs, and any metal accessories you add to your solution.
- Hardware Style: If you have doors or drawers in your solution, you can select a handle or knob that best suits your style. You can also customize the color of them! Either choose the same hardware finish you selected for your entire design, or use a different finish for a more custom look.

Customize Shoe Shelf Color: If you have added an Adjustable Shoe Organizer to your design, you can customize the color of the metal shelves you would like to include in it. Select the shelf color you prefer and be sure to press “Save” when you’re finished.

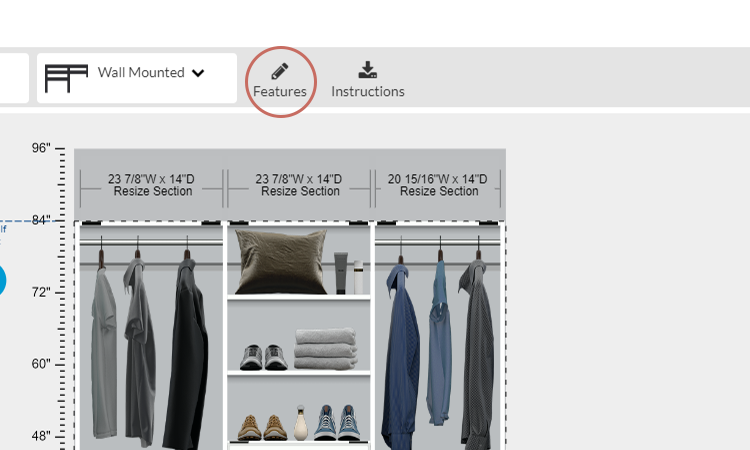
Change Wall Mount Type
Customizing the Mount Type of your design is one of the most important features within the design tool, as it impacts your installation and price point.
- Wall Mount: The most economical solution, a Wall Mounted system is suspended approximately 12 inches off the floor with an additional 12 inches of storage space above the top shelf. The solution is easily installed to your wall with a steel rail. Selecting this option in the top menu will convert your entire design into a Wall Mounted solution.
- Floor Mount: A Floor Mounted solution rests on the floor and is secured to the wall with L Brackets. To ensure enough space for double-hanging storage, floor-mounted closets must have a top shelf height of 89”. Removal of existing base trim is required during installation to allow the system to sit flush with the wall. Selecting this option in the top menu will convert your entire design to a Floor Mounted solution.
Advanced Features
- Wall Type: If you have a non-standard wall type that includes concrete or steel/aluminum studs, select the one that matches your space. You can also select a paint swatch for your wall.
- Crown Molding and Top Shelf: Add a top treatment to your design! A simple top or crown molding can add the wow factor to any design.
- Floor Molding: If you have a floor-mounted solution, you can select a base molding profile that complements the style of your home and EasyClosets solution.
- Vertical Panels: For any vertical panels in your design that are less than 60” in length, you have the option to add a rounded corner (radius) to the panel. Some customers prefer this for its aesthetic qualities, while others prefer to implement it as a safety precaution.

Download Instructions: At any time when designing with EasyClosets, you can download the installation instructions for your solution by simply clicking the “Instructions” button at the top of your screen.

Design Warnings: Design Warnings alert you that our design checker has found ways to enhance your solution to be more functional. It’s important to read and address all the design warnings before adding your EasyClosets solution to your shopping cart. To learn more about design warnings, click here.